
Learn everything about transplanting — what it is, when to do it, and how it helps your garden thrive. Expert transplanting guide from PlantingWell.com.
Transplanting is one of the most effective ways to give your plants a head start, especially in regions with short growing seasons or unpredictable weather. Whether you’re growing vegetables, herbs, or flowers, learning how and when to transplant can dramatically improve your garden’s health, yield, and overall success.
At PlantingWell.com, we believe in smart, sustainable gardening techniques. In this guide, we’ll walk you through the what, why, and how of transplanting, offering practical tips to make the process smooth and successful — even if you’re a beginner.
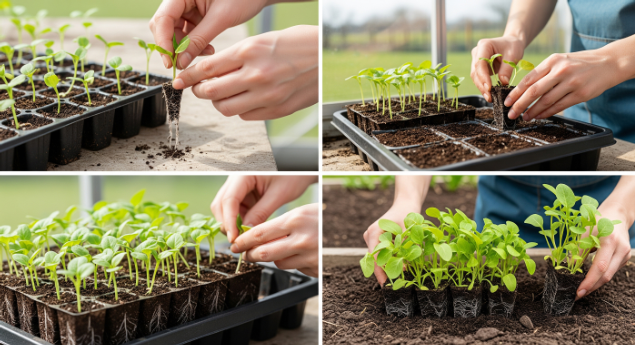
Transplanting is the process of moving a plant from one growing environment to another. Typically, it involves starting seeds indoors or in a controlled environment, then transferring them into a larger pot or directly into the garden once they’re strong enough.
It gives gardeners greater control over plant development, allowing them to optimize growing conditions during the most vulnerable stages of a plant’s life.
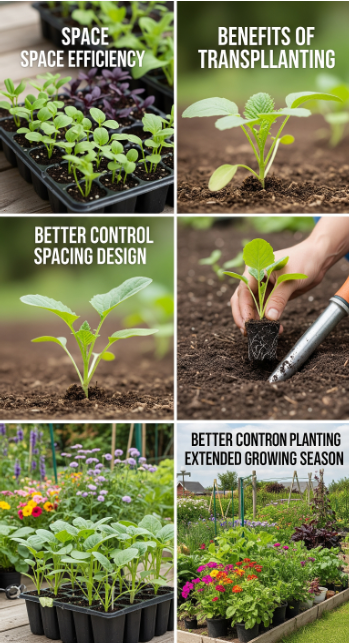
Transplanting offers several advantages that make it a go-to method for many gardeners:
By starting plants indoors before the last frost, you can extend the growing season by weeks or even months.
Transplants are less likely to be affected by early pests, diseases, or harsh weather, leading to better survival rates.
You can begin multiple seedlings in a small indoor space before selecting the healthiest ones to move outdoors.
Transplanting lets you prepare the next round of crops while others are still growing in the garden — perfect for continuous harvests.
You can arrange plants in your garden exactly where you want them, optimizing space and sunlight exposure.
Timing is critical when transplanting. Transplant too early, and your plant may suffer from frost. Too late, and it might get root-bound or stressed.
Seedlings should have 2–3 sets of true leaves before transplanting.
Outdoor temperatures should be appropriate for the specific plant (check your USDA hardiness zone).
Soil should be workable, warm, and not soggy.
Roots should be well-formed but not circling or bound inside the container.

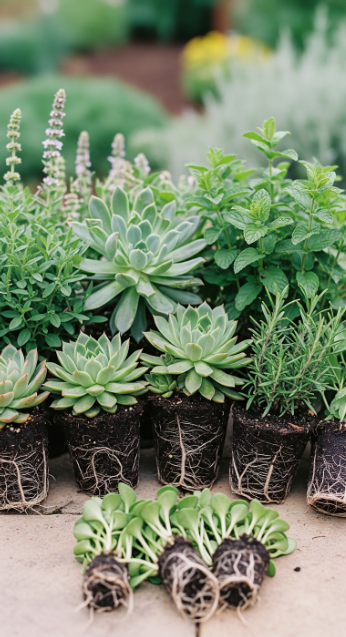
Some plants thrive when transplanted, while others prefer direct seeding. Here’s a breakdown of the best crops to transplant:
Tomatoes – One of the most common and successful transplant crops.
Peppers – Need warm soil and benefit from an early indoor start.
Cabbage & Broccoli – Cool-weather crops that prefer transplanting.
Lettuce – Easy to transplant, especially for early harvests.
Eggplants – Thrive when started indoors and planted into warm soil.
Marigolds – Transplant well and help with pest control.
Petunias – Require early indoor sowing to bloom all summer.
Snapdragons – Benefit from transplanting to bloom early in the season.
Basil – Prefers warm soil; transplanting helps get a jumpstart.
Oregano & Thyme – Slow to start from seed; better started indoors.
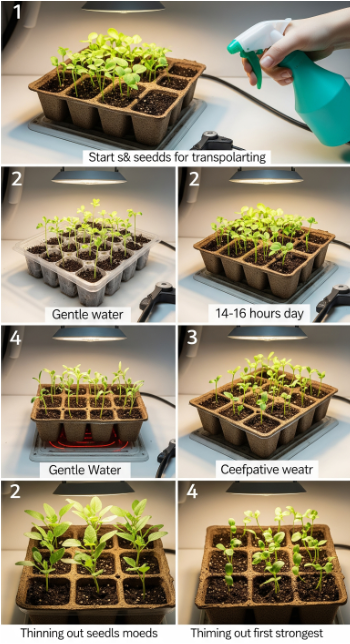
Before you can transplant, you need strong, healthy seedlings. Here’s how to start them right:
Use seed trays, cell packs, peat pots, or even recycled containers with good drainage.
Opt for a light, well-draining mix formulated specifically for seed starting—not regular potting soil.
Use a heat mat to maintain soil temperatures between 65–75°F (18–24°C).
Once seeds germinate, place them under grow lights for 14–16 hours a day.
Keep the soil moist but not soggy. Use a spray bottle for gentle watering to avoid disturbing young roots.
Once seedlings grow their first true leaves, thin out the weakest ones to give the strongest a better chance.
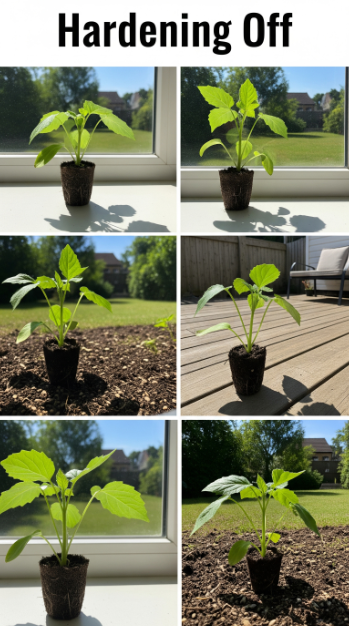
Hardening off is the gradual process of acclimating indoor-grown seedlings to outdoor conditions. Skipping this step is one of the most common mistakes in transplanting.
Start 7–10 days before transplanting.
Place plants outside for 1–2 hours per day in a sheltered spot.
Gradually increase exposure to sun, wind, and fluctuating temperatures.
Avoid full-day direct sun or strong wind in the early stages.
Water regularly to avoid stress.
By the end of the hardening period, your plants should be toughened up and ready for life in the garden.
Here’s how to successfully transplant your seedlings into the garden:
Pick a calm, cloudy day if possible. If it’s sunny, transplant in the early morning or late afternoon to avoid stress from the midday sun.
Loosen the soil to at least 8–10 inches deep.
Mix in compost or organic fertilizer to enrich the soil.
Ensure good drainage — avoid soggy spots.
Create a hole slightly larger than the root ball of the seedling. For leggy seedlings like tomatoes, bury them deeper to encourage strong root growth.
Squeeze the sides of the container to loosen the soil.
Avoid pulling the plant from the stem — always handle by the root ball or leaves.
Place the seedling in the hole and gently firm the soil around it to remove air pockets.
Water the seedling well after transplanting to settle the soil and reduce transplant shock.
Apply mulch around the base to retain moisture and suppress weeds. Stake plants like tomatoes or peppers if needed.

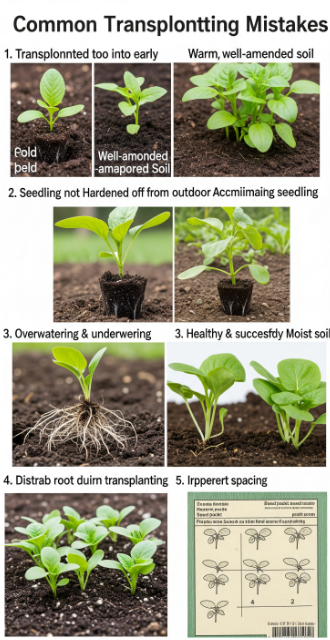
Avoid these common pitfalls for better transplant success:
| Mistake | Solution |
|---|---|
| Transplanting too early | Wait until soil and air temps are suitable |
| Not hardening off seedlings | Gradually expose plants to outdoor conditions |
| Overwatering or underwatering | Keep soil moist but not soggy |
| Root disturbance | Be gentle when removing from pots |
| Improper spacing | Follow spacing recommendations on seed packets |
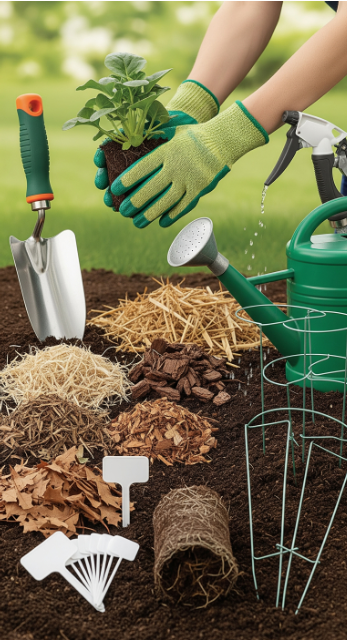
Here are some handy tools to make transplanting easier:
Hand trowel
Garden gloves
Watering can or hose with soft spray
Mulch (straw, bark, leaves)
Plant labels or markers
Stakes or cages for support
Bury two-thirds of the plant to encourage root growth.
Add crushed eggshells or bone meal to the hole for calcium.
Don’t plant too early — they need warm soil.
Mulch well to maintain warmth and moisture.
Space at least 18 inches apart.
Use row covers to protect from pests.
The first 7–10 days after transplanting are critical. Here’s how to care for your plants:
Water regularly (daily if needed) to help roots settle.
Shade sensitive plants during hot weather for the first few days.
Watch for signs of stress like wilting, yellowing, or drooping.
Feed lightly after one to two weeks with compost tea or diluted organic fertilizer.
Both methods have their pros and cons. Often, a combination of both gives you the best results.
| Category | Direct Seeding | Transplanting |
|---|---|---|
| Cost | Low | Moderate |
| Control | Less | More |
| Crop Suitability | Carrots, radishes | Tomatoes, peppers |
| Time to Harvest | Slightly longer | Shorter |
| Risk of Shock | None | Some (if not done properly) |
Transplanting is a powerful skill that every gardener should learn. It allows you to plan your garden with precision, extend your growing season, and give your plants the best possible start in life.
At PlantingWell.com, we’re here to help you grow smarter, healthier, and greener. Whether you’re planting your first seedling or fine-tuning your garden strategy, transplanting is your key to success.

Plantingwell.com is a gardening website offering easy, sustainable tips for growing vegetables, herbs, and flowers. Perfect for beginners and green thumbs alike.
Zatplant with Passion by Rometheme © 2023 All rights reserved